Get Started with
the MaxxStick Ergo Pro
Do you need help connecting?
FREE Shipping to Select Countries!
Do you need help connecting?
When you open the MaxxStick Ergo Pro box, the layout is simple and easy to follow. The main unit sits right on top, and the accessories are stored in the small compartment beside it. Inside, you will find:
• The Ergo Pro
• An optional rubber pad
• A six foot USB C cable tucked inside the compartment box
Black Ergo Pros are paired with red cables. White Ergo Pros come with black cables.
Some customers have reported that their joystick sticks or rubs when moving in certain directions. After looking into it, we found that the thumbstick sits slightly higher than our tight tolerances allow, which causes it to brush against the casing.
The fix is straightforward. A firm press on the joystick seats it fully. It does take more force than most people expect, but in every unit we have tested, this adjustment has resolved the issue completely. We have not seen a single case where this method failed.
Once seated, the joystick moves freely and works as intended. If you run into this, the video here walks you through exactly how to make the adjustment.
Use our web-based Maxx Utility to configure your MaxxStick Ergo.
✅ Switch between XInput, Keyboard, and DirectInput.
✅ Customize keybindings (Keyboard Mode).
✅ Adjust sensitivity.
✅ Create lock angles and accelerate left-right movement.
Just open it in your browser and start configuring!
This video shows you how to connect your MaxxStick using a browser and access the Maxx Utility for easy setup. Make sure your firmware is updated to version 5.6 or higher for the best performance. Calibrate your stick’s forward direction for intuitive control. Customize and save profiles for your favorite games to access them quickly. Follow these simple steps to improve your MaxxStick experience!
We do our best to come up with new and novel improvements to your MaxxStick. We make these upgrades free through our Maxx Utility. The upgrade process is very simple:

Advanced Game Mode lets MaxxStick function like an Xbox controller in many modern games, including Fortnite. Enjoy full console-style control for an immersive experience.
Basic Game Mode lets MaxxStick work just like a keyboard—no extra apps needed. Just plug in, choose your keys in our Maxx Utility, and update your game settings to match. It’s as simple as that.

Classic Game Mode is ideal for older games and systems like Linux and MacOS. It’s hidden by default and needs to be activated in the Maxx Utility.
Please try all of our modes to see which one is right for your game.
⚠ Some games, like Fortnite, allow controller + KBM inputs together. Others don’t. If movement feels off, try switching to Keyboard Mode in the Maxx Utility.
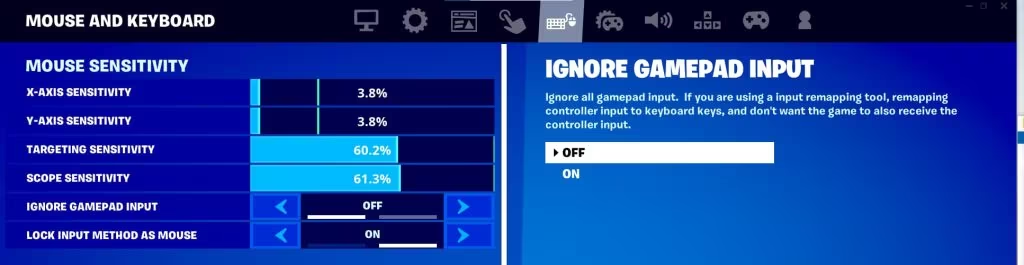
To use MaxxStick smoothly in Fortnite, adjust these settings:
Fortnite Settings → Mouse and Keyboard Tab:
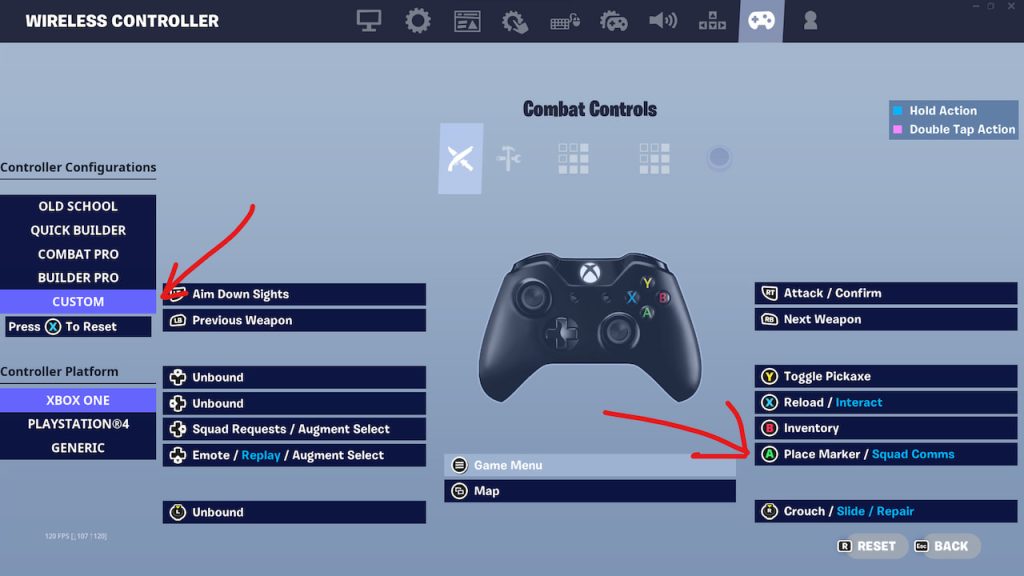
Remap the Joystick Button (A) in Controller Settings:
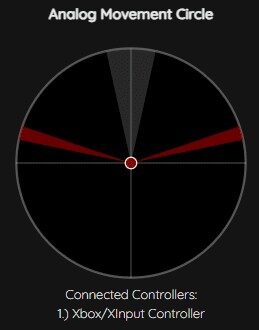
Before firmware version 5.6, a communication bug caused the joystick circle to show no movement in Xinput mode unless you adjusted a flag in your browser. This issue is fixed in firmware 5.6 and later, which you can install for free using the Maxx Utility. We strongly recommend updating your firmware following the instructions above.
If you choose to keep an older firmware, tools like Maxx Utility and Gamepad Tester will not detect movement unless you change a Chrome flag.
Your joystick movement will now show in our Maxx Utility.
If you face any problems with your MaxxStick keyboard joystick our knowledgeable team is here to help. Get assistance for your purchase through the support page of our website.